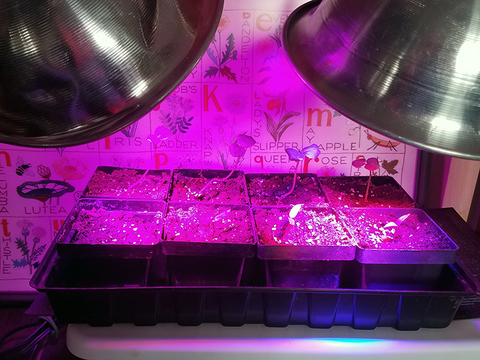
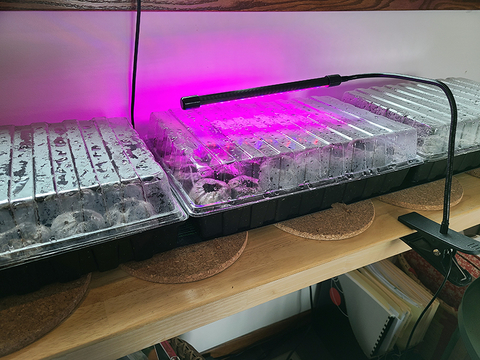
As I write this, most of the state is experiencing a blizzard, and summer couldn’t feel further away. Believe it or not, it’s already time to plant vegetables like onions, leeks, and celery, as well as a variety of flowers. This article will cover some seed starting basics, with example set-ups for inspiration.
Serious gardeners who want to start large quantities of seeds will benefit from certain investments like artificial lights and heating pads. But for gardeners who are growing a small number of plants or just starting out, materials you already have on hand may suffice.
When should you get started?
Certain vegetables and flowers need a big head start to produce an edible crop during our short Minnesota growing season.
- February is the optimal time to seed leeks, onions, and celery.
- Early to mid-March is the best time to plant early season cold-tolerant plants like broccoli, cabbage, and head lettuce, and long-season heat-loving plants like peppers, okra, and eggplant.
- If you mainly just start tomatoes at home, you can wait until early April.
For a full list of flowers and vegetables and when to plant them indoors in Minnesota, check out Extension’s seed starting webpage.
You might notice that a variety of garden vegetables like sweet corn, beans, squash, and carrots are not on the list. There are a few reasons that it’s better to direct seed some vegetables in the garden vs. starting them ahead of time.
- For vegetables like carrots, radishes, or leaf lettuce, the sheer number of seeds you would have to start indoors to get a good harvest makes transplanting impractical from a space and time-saving perspective. For crops like carrots with a taproot, transplanting can restrict root development.
- Some large-seeded vegetables like beans, peas, and corn grow very quickly since the seed has a lot of stored energy for the seedling. While these plants can be transplanted, direct-seeded crops in the garden often catch up with transplanted seedlings, making it impractical to start them indoors. They can also quickly outgrow their cells when planted indoors.
- Cucurbits (squash, cucumbers) have very sensitive roots. While these crops can absolutely be transplanted, take great care to avoid disturbing the root system. Using soil blocks or pots made of peat or cow manure can help reduce transplant shock since seedlings are less likely to become root-bound in these types of pots.
Tools to help your plants grow
Starting seeds at home can be intimidating. It may feel like you need to spend hundreds on equipment, but there are great options for starting seeds using materials you may already have. In general, seeds need a few things to succeed:
Light
Once your seeds germinate, they’ll need light to keep growing. In some cases, a very bright, south-facing window will provide plenty of sunlight, but most gardeners will need to supply some amount of artificial lighting. Relying on the natural light from a window works best for seedlings that will only be indoors for a few weeks.
Plants like peppers that need a few months' head start will begin to stretch towards the light if they are not receiving the amount of light they need, which leads to skinny, weak stems. Check out our page on indoor lighting for plants to help you decide which types of grow lights are best for you.
Heat
Most seeds germinate faster in warm soil and grow more quickly. Seedlings growing in cool soils are more prone to damping off. So, how can you provide heat to your seedlings? Many gardeners purchase heat mats to place beneath their seedling trays. These mats vary in quality and price, from around $10 for a mat that fits a single tray, to more like $70 for a mat that accommodates 4-5 trays. Some seedling mats have temperature controls, but for the average gardener, a simple mat without temperature controls should be sufficient.
Or, if you have a warm spot in your home such as a shelf over a radiator or above baseboard heaters, simply place your seedlings there.
Humidity and water
Seedlings need humidity to germinate. There are a few options for providing humidity. Many garden stores sell domes that fit over the top of seedling trays. If you don’t have a dome, try simply using a sheet of plastic wrap. In lieu of plastic, simply water your seedlings often and avoid letting your soil dry out. However, once they’ve sprouted, it’s important to remove some of the humidity in the atmosphere to prevent potential disease issues. Remove the dome or plastic from your seedling trays once the majority of seedlings are emerging above the soil.
Soil contact
Seeds need good soil contact to germinate, so make sure to pack down your potting soil.
Check out our seed starting set-ups for inspiration
There is no perfect way to start your seedlings. For some inspiration, check out three videos that our team made last year from our seed starting setups at home:


