Quick facts
- When selecting vegetable varieties, check packets for the number of days until harvest to be sure your choices will ripen before frost.
- Many long-season vegetables must be started indoors in early spring.
- Many annual flowers need an indoor start if they are to bloom during the summer.
Starting garden plants from seeds indoors can be an enjoyable project for any gardener. It's a relatively inexpensive way to grow a wide variety of plants. Many garden favorites are found in a greater variety of colors, sizes and growth habits as seeds, rather than as started plants.
Planning for indoor seed starting

Seeds are available from many sources, ranging from your local building supply store to garden centers and mail order catalogs. Their prices can vary greatly. The newest hybrids command higher prices, as do seeds of rare or unusual plants, as well as certified organic seed.
Planting and care information is often more complete on name-brand seed packets. If name brand and "off brand" seed varieties are the same for a given flower or vegetable, there shouldn't be any difference in the plants' ultimate quality. The percentage of germination and seed purity is governed by law.
- Don't buy more seed than you will use in two or three years.
- The fresher the seed, the greater the chances that all the seeds will still be viable.
- Fewer and fewer seeds from a packet will germinate as time passes.
- Leftover seeds can be saved for the next year.
- As soon as you're done planting, store seed packets in an air-tight container in a cool place: the refrigerator is ideal.
- To keep the humidity low in the container, add a packet of silica gel. A teaspoon of powdered milk in a piece of facial tissue or paper towel will also absorb moisture.
Choose a place that is:
- Safe from heavy traffic, pets, cold drafts, and excess heat
- Where spills of potting mixture, water, or fertilizer will not be a problem
- With enough space to accommodate later sowings of seed
- With enough space for seedlings to grow and be transplanted to larger containers
- Where air temperatures are above 60°F and adequately warm if bottom heat is provided
- A basement can be a good place to start seed
Avoid the windowsill
- Most seeds need consistently warm soil to germinate and produce strong roots.
- Cooler soil temperatures can lead to seedling death due to disease.
- Excess heat during the day can dry out the potting mix, leading to seedling death.
- Windowsill-grown seedlings tend to be excessively tall, with thin, bent stems.
- Starting seeds on a windowsill can lead to water damage to woodwork.
A windowsill is not a good location for starting seeds. Window sills can be the coldest place in the house, especially at night, and then the hottest during the day.
Sunlight in Minnesota gains strength through April and May. But sunlight through a window is relatively weak compared to artificial light sources kept close to the plants. There are also many cloudy days of very low light levels during a Minnesota spring.
If you're starting only a few plants and have roomy window sills, a south-facing window may be all the growing space you need.
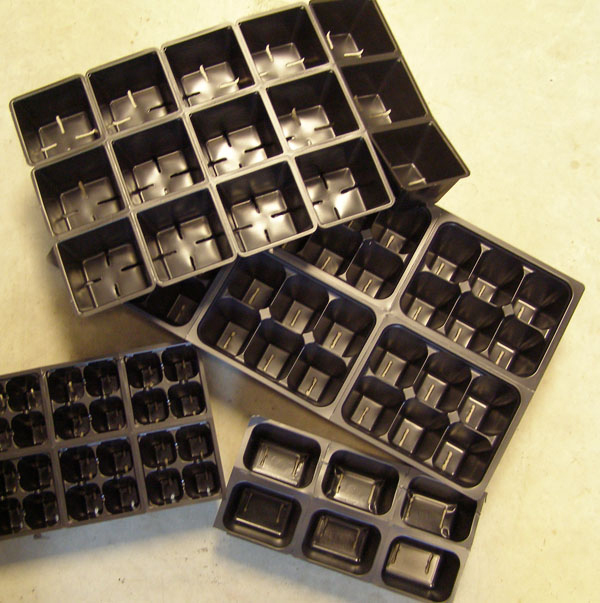
Start seeds in small, individual containers. It's best to use divided containers with a single seedling per container, rather than filling a larger container with potting mix and sowing many seeds, because the seedlings' roots will grow into each other and are likely to be injured later during transplanting.
- Plastic sheets of small containers (cell flats) fit into standard solid trays.
- Small individual plastic pots are also suitable.
- All seed starting containers must have drainage holes at the bottom.
- Most plastic seed-starting containers are reusable.
- To avoid diseases from previous plants:
- Sterilize used containers by soaking the cleaned containers in a solution of bleach or other disinfectant for 30 minutes, then rinse and use.
- Mix the solution to the strength recommended on the label for disinfecting surfaces.
There are many kinds of fiber pots made from organic materials such as peat, cow manure, and shredded wood. Some gardeners make pots from strips of newspaper. Fiber or paper pots that break down in the soil are particularly good for raising seedlings that don't transplant well, such as cucumbers and squash.

Clear plastic domes that fit over trays of plants allow light in, but help keep moisture from escaping. They can also help retain heat provided to the root zone. The domes should be removed when the seedlings are tall enough to touch them.
Exceptions to using individual containers are onions and leeks from seed. These can be started in one larger flat and transplanted out into the garden while still small without harm to the seedlings.
Commercial seed-starting mixes, usually composed of vermiculite and peat, without any true soil, are recommended for starting seeds. They're sterile, lightweight and free from weed seeds, with a texture and porosity especially suited to the needs of germinating seeds and tiny seedlings.
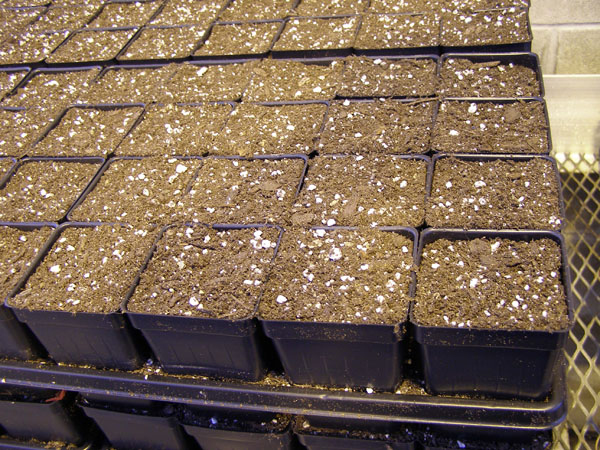
Set the cell flats or containers into a solid tray, fill them with potting mix, and water the mix before sowing seeds. The potting mix will settle down into the containers. Add more potting mix and water again, until the containers or cells are nearly full.
- Follow seed packet or catalog instructions, as each species has its own requirements.
- In Minnesota, annual flowers and heat-loving vegetables such as tomato, pepper and eggplant are usually started in early spring.
- Cabbage and broccoli intended for fall crops may be started indoors in June or July.
- Tiny seeds, such as those of alpine strawberry, may need to be started as early as February.
When to plant seeds and how long to keep them indoors
| Month | How long to keep indoors | Plant |
|---|---|---|
| Mid-January | 16-17 weeks | Flowers: lisianthus |
| Early February | 14-15 weeks | Flowers: geraniums, pansies/violas, wax begonias Vegetables: leeks, onions |
| Mid-February | 12-13 weeks | Flowers: browallia, clarkia*, dusty miller, fountain grass, impatiens, larkspur, lobelia, nemesia*, stocks, torenia Vegetables: celery |
| Early March | 10-11 weeks | Flowers: ageratum, coleus, dahlia, gazania, heliotrope, lavatera*, petunias, rudbeckia (black-eyed Susan), scabiosia, schizanthus, snapdragons, verbena, vinca/periwinkle Vegetables: broccoli, Brussels sprouts, cabbage, cauliflower, head lettuce |
| Mid-March | 9 weeks | Flowers: bells of Ireland, candytuft, cleome, dianthus/pinks, hollyhock, marigold (African), melampodium, mimulus, nicotiana, nirembergia, ornamental pepper, annual phlox, salpiglosis, scarlet sage/salvia, statice, strawflower, sweet alyssum, tithomia, trachymene Vegetables: eggplant, okra, peppers |
| Early April | 5-6 weeks | Flowers: amaranthus, aster, baby's breath, bachelor buttons, balsam, calendula, celosia, cornflower, four o'clock, marigold (French and gem), morning glory, nasturtium, ornamental basil, ornamental kale, portulaca, strawflower Vegetables: tomatoes |
| Mid-April | 3-4 weeks | Flowers: cosmos, sweet peas, thunbergia, zinnia Vegetables: sweet potatoes |
| Early-mid May | 1-2 weeks | Harden off all plants |
* Use peat pots or other biodegradable pots as these plants are more sensitive to damage during transplant.
Planting and growing seeds indoors
Sowing seeds
- Sow fresh seeds individually into each container according to package directions.
- If you are unsure about seeding depth, a rule of thumb is to plant a seed four times as deep as its width.
- Plant a seed deeply enough that three more seeds could be placed directly above it.
- Identify each container or tray with a tag. Use permanent marker.
- Some seeds require light to germinate.
- Cover them with a thin layer of fine vermiculite, porous enough to permit light to penetrate, yet keep the medium moist enough to encourage seed germination.
- Place cell packs containing seeds that need darkness for germination in dark plastic bags or cover them with several layers of newspaper until seeds sprout.
- When using older seeds with lower germination rates, plant two or more seeds per cell.
- Once the seedlings have developed true leaves, cut all but the healthiest one off at ground level with scissors.
- Avoid separating or pulling the unwanted seedlings as this could damage the roots of the one you want to keep.
Light
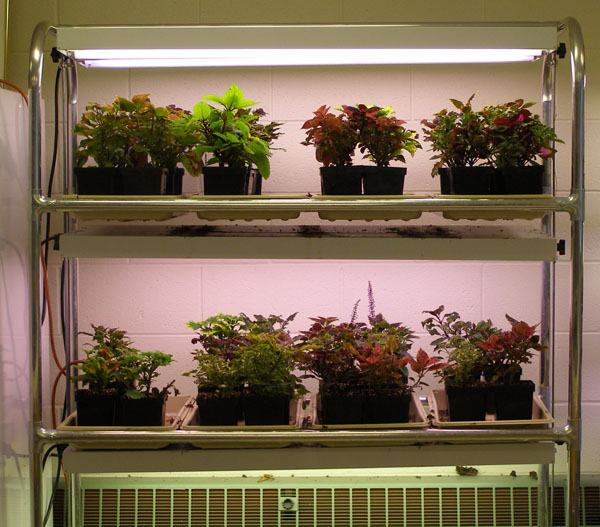
It's much better to grow seedlings under fluorescent lights than to rely solely on natural light, even in a greenhouse.
Some brands of lights are sold as "grow lights," designed to provide light in specific ranges required by plants. Standard fixtures with two "cool white" fluorescent tubes per fixture also give plants adequate light and are inexpensive.
A combination of cool white and natural daylight tubes provides good light for plants and is more appealing to people.
- Hang lights from chains to ease raising them as the plants grow.
- Keep lights no more than 4 inches above the tops of your seedlings: as close as 2 inches is ideal. Lack of light is the major cause of elongated, skinny stems.
- Plants need 12 to 16 hours of light daily. Don't leave the lights on continuously, as many plants need some dark period each night to develop properly.
- A simple timer can be part of the set-up so lights are turned off and on automatically.
Bottom heat
- Providing a constant heat source from underneath can be very beneficial to seedlings.
- Temperatures in the potting mix of indoor containers can be as much as 5°F lower than indoor air temperatures.
- Seeds of most plants started indoors germinate sooner and produce healthier roots when the potting mix is warm.
- Bottom heat can help to prevent damping off, the death of tiny seedlings due to pathogens at the surface of the potting mix.
- Electric heating mats specifically for seed starting are available from many garden centers and online suppliers.
- If you use a timer for lights above the seedlings, don't plug the heat mats into it.
Watering and fertilizing
- Keep the potting mix moist while the seeds are germinating.
- A spray bottle to water the surface gently without washing the potting mix out of the containers may be useful. Water can also be added to the tray and allowed to move up into the mix.
- In either method, drain excess water that remains or accumulates in the tray, to keep roots healthy.
- Seedlings draw energy for germination from nutrients stored in the seed. They don't need fertilizer until they have several sets of true leaves.
- Seedlings grown in a soil-less mix will benefit from a weak general purpose water-soluble fertilizer mixed 1/4 strength.
- Fertilize only once a week.
- Water as needed the rest of the week with plain water.
Transplanting
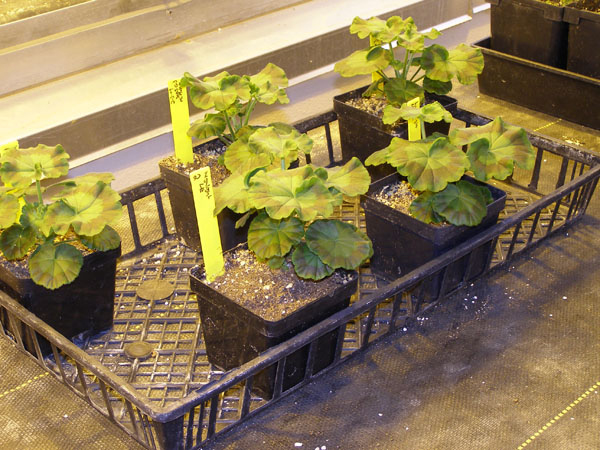
- Transplant seedlings that outgrow cell packs into larger containers. Larger peat pots or plastic cups with holes punched in their bottoms work well.
- Lift seedlings by the rootball using a spoon or plant tag for support if necessary.
- Never hold the seedling by its stem, as you may crush it, or harm the growing tip.
- If you feel the need to steady the plant from above, lightly hold the plant by a leaf.
- A seedling that has lost a leaf can grow another, but a seedling that has lost its growing point cannot survive.
- Larger seedlings in larger containers will require more space and often another set of lights.
Moving seedlings outdoors
Hardening off seedlings
Plants started indoors will not have been exposed to full sun, wind or fluctuating temperatures. If they are not gradually accustomed to the outdoor environment, a process called "hardening off," their leaves may be scorched by sun or wind. They may even wilt and die.
- Two weeks before planting outdoors, move seedlings outside.
- Start by putting them outside for a few hours in the shade during the warmth of the afternoon, protected from wind.
- Bring them back inside before temperatures start to drop at night.
- Each day, leave the plants out a little longer, and expose them to a little more direct sunshine.
- By the end of two weeks, unless freezing temperatures are forecast, the seedlings can stay outside in a sunny area until you are ready to transplant them into the garden.
How to use a coldframe
An easy way to harden off plants is to place them in a coldframe, a temporary mini-greenhouse.
- Commercially produced coldframes are available in many designs.
- Construct a simple coldframe. See Extending the growing season.
- Adjust the lid of the coldframe as needed to protect plants from freezing temperatures.
- Vent the lid a bit farther each day to accustom the plants to wind and cold.
Planting outdoors
Once they have been hardened off, seedlings can be set out in the garden. Transplant on a cloudy day or late afternoon when the sun has passed its peak.
Hardened off plants may wilt when first exposed to full sun, but they generally recover within a day or so. Row covers and other types of plant protectors can help plants get off to a good start in the garden by reducing damage from wind and temperature fluctuations.
When transplanting seedlings grown in peat pots, newspaper pots, cow-dung pots or any other containers made of organic matter, trim the collars of the pots down to soil level so they don't wick water away from the root zone. To encourage roots to spread out into garden soil, carefully cut or tear holes in the bottoms of the pots.
Reviewed in 2024