Quick facts
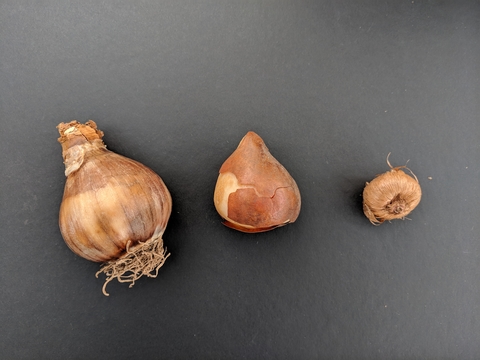
- The term "bulb" includes corms, tuberous roots, rhizomes and true bulbs.
- Bulbs are available in a wide variety of sizes, colors and forms.
- Flowering bulbs are easy to care for and add color and texture to the garden.
Bulbs and bulb-like structures provide energy for plants to grow, bloom and complete their life cycles each year.
There are several types of bulbs and bulb-like structures:
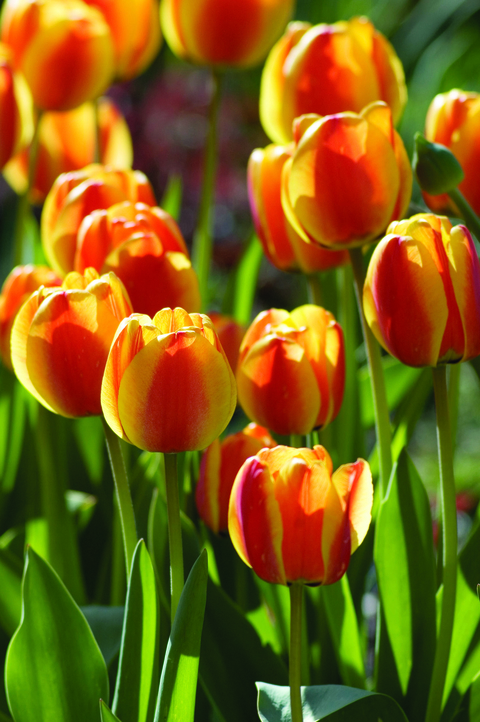
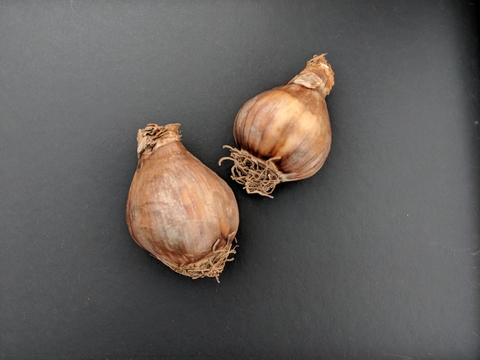
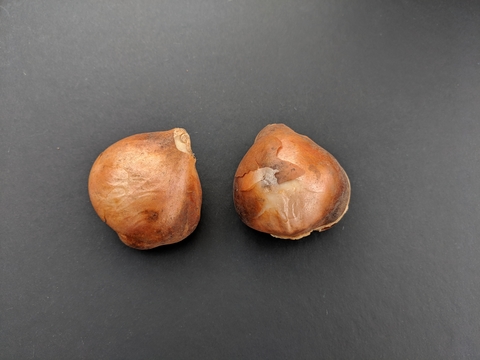
- True bulbs are divided into two groups: scaly bulbs like Asiatic lilies (Lilium asiatic) and tunicate bulbs like tulips (Tulipa species).
- Tubers like dahlias (Dahlia hybrids) have leathery skin and have "eyes" that are buds.
- Rhizomes such as iris (Iris hybrids) are really underground stems and grow just below or on the soil surface.
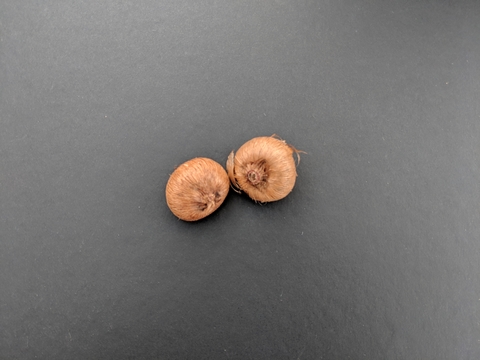
- Corms, such as crocus (Crocus vernus) and gladiolus (Gladiolus hybrids) are a type of compressed stem that contains food and has a bud on top.
Bulbs may be hardy (spring- and early summer-flowering) or tender (summer-flowering).
Hardy bulbs
Hardy bulbs or spring flowering bulbs require a cold period to break their dormancy and begin spring flower development.
- Plant hardy bulbs in the fall.
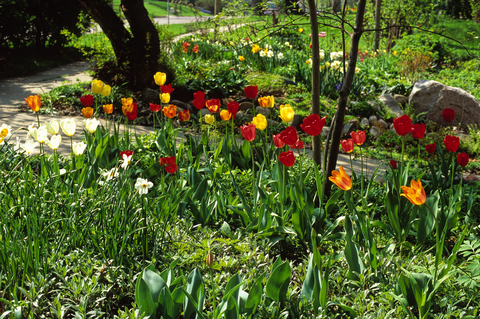
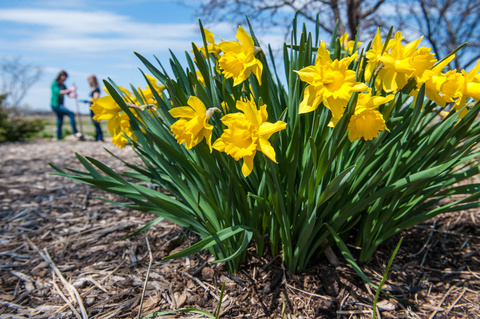
- Hardy bulbs, such as tulips and daffodils, can be left in the ground to flower year after year.
- Examples of hardy bulbs are tulips, daffodils (Narcissus species and hybrids), iris, crocus and lilies.
Hardy bulbs are quite easy to work with, require minimal care once properly planted, and come up every spring with a wonderful show of color.
Tender bulbs
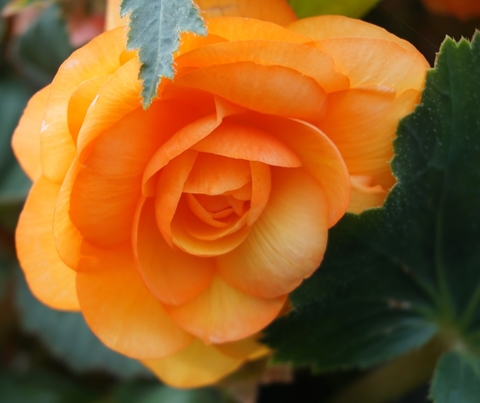
Tender bulbs, including dahlias, begonias (Begonia tuberosa) and gladiolus, are planted in the spring for summer bloom. Plants with tender bulbs are popular for use in perennial borders, cutting gardens or as bedding plants.
- Tender bulbs have fleshy bulbs, corms, tubers or roots.
- They cannot survive cold winter temperatures and must be dug up each fall.
- Store them for the winter indoors in a cool, dry place.
- Tender bulbs are planted in the spring after the soil has warmed.
How to plant bulbs, tubers and rhizomes
Before purchasing bulbs:
- Check for any signs of disease or damage, such as cuts or bruises.
- The bulb should be firm and have a protective papery skin.
- Do not purchase bulbs that are soft or moldy.
Purchase hardy bulbs in August-September and plant the bulbs as soon as possible.
- In places with cold climates, like Minnesota, planting time is usually from mid-September to mid-October.
- Planting at this time helps the bulb to grow roots before the ground freezes.
- Tulips are one exception; you can plant these as late as you can get them into the soil.
- Store bulbs in a dry place away from direct sunlight until you are ready to plant them.
Purchase tender bulbs in late winter or early spring.
- They may be started indoors in early spring.
- You can plant them outdoors in spring, once the danger of frost has passed.
Ideal warmth
Both hardy and tender bulbs need warmth and bright light to trigger proper growth.
- Choose locations that are sheltered from damaging winds.
- Avoid planting in low lying areas where frost usually collects. Tender plants may be damaged early when they are just poking through the soil.
- Plants are usually not affected by light to moderate frosts later in the flowering process.
Note that soil near building foundations, especially with a southern or western exposure, may warm up earlier than other areas of your yard causing bulbs planted there to flower earlier.
Early bloomers like these may suffer cold damage. Mulch soil in these areas to help soil warm up more gradually. This will help bulbs to bloom at the right time, when cold damage to flowers and foliage is less likely.
Light
Bulbs need ample light for spring growth and even after the flowering process is completed. After flowering, the leaves generate energy through photosynthesis that is stored in the bulb structure for next year.
The more light bulbs receive, the more energy they generate and the more likely they are to bloom year after year.
Hardy bulbs can be planted underneath or near deciduous trees and shrubs. The hardy bulbs are done blooming by the time the leaves on deciduous trees become dense enough to produce shade.
Bulbs grow best in rich, well-drained soil. A soil test is helpful in determining what additions or "amendments" are needed to improve your soil before planting. Submit a soil sample to the University of Minnesota Soil Test Laboratory every 3-5 years.
- Avoid planting in areas with standing water.
- Prepare planting sites by removing debris such as rocks, sticks, matted roots, etc.
- Use a garden fork or a tiller to work organic matter such as peat moss, fine compost or shredded leaf mulch into the planting area.
The organic material helps to amend soil, creating a good growing environment for bulbs.
Most Minnesota soils are rich in phosphorous, an important macronutrient for blooming. Unless your soil test shows a deficiency in phosphorous or potassium, skip the fertilizer and add in compost when planting bulbs.
Bulbs are much more attractive if planted in odd numbered groups or mass plantings.
The planting depth and spacing depends on the individual bulb. Follow the instructions provided on the bulb package.
Generally, plant bulbs two to three times deeper than their diameter. This will vary with the type of soil.
- With light, sandy soils, plant 1 or 2 inches deeper and on heavier clay soils, set the bulbs an inch or two more shallow.
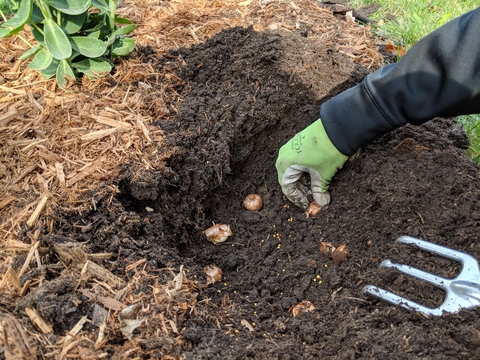
- With the pointed end facing up, set the bulb in the prepared soil, so that the base is resting at the appropriate depth.
- Once the bulbs are all placed, cover with half of the soil and thoroughly soak the area with water.
- Add the remaining soil and rake smooth to level the surface of the bed.
- Water and cover the soil surface with 2-3" of leaf mulch, wood mulch or clean (seedless) straw to help hold in moisture and help soil temperatures to drop/raise more gradually as the seasons change.
Additional tips for hardy bulbs:
- If fall and/or spring are dry with less than normal rainfall, and soil becomes dry, water bulbs till soil is saturated (wet throughout).
- Animals like squirrels and chipmunks, may dig up and eat bulbs after being planted, especially tulips (narcissus bulbs are poisonous). To protect bulb plantings after planting, lay a piece of chicken wire flat over the planted areas and anchor with U-shaped staples normally used with landscape fabric. Cover the wire with mulch. The wire will make digging up the bulbs difficult and the bulbs will easily grow through the wire holes.
- Be sure to label what you planted and where, to prevent digging up bulbs by accident during your spring garden work.
Hardy bulbs and their care
Hardy Bulbs for U.S.D.A. Cold Hardiness Zones 3 & 4
Scientific name
Common name
Allium aflatunense
Purple allium
Allium giganteum
Giant allium
Anemone blanda
Greek anemone
Chionodoxa luciliae
Glory of the snow
Crocus chrysanthus
Snow crocus
Colchicum autumnale
Autumn crocus
Erythronium spp.
Trout lily, dogtooth violet
Fritillaria spp.
Fritillaria, checkered lily
Galanthus nivalis
Common snowdrop
Hyacinthus orientalis
Hyacinth
Lilium lancifolium
Tiger lily
Muscari armeniacum
Grape hyacinth
Narcissus hybrids
Daffodil
Puschkinia scilloides var. libanotica
Striped squill
Tulipa hybrids
Tulip
Move mulch aside as soil and air temperatures begin to warm. If a hard frost is forecasted, just push the mulch back over spring bulbs to lessen the change of frost damage.
- If rainfall is below normal in spring, and the top few inches of soil become dry, water thoroughly during and after flowering to ensure that enough moisture is reaching the roots.
- Be careful not to overwater. Soggy, wet conditions will promote bulb rot.
- Fertilize lightly as the flowers begin to die. Select a fertilizer labeled for bulbs and follow the product instructions for how much to apply. Make sure this is watered in well.
- Cut off the faded flowers after blooming. This will prevent the plant's energy going towards seed production.
- Keep the leaves green and healthy as long as possible and do not remove leaves until they have yellowed and withered. The longer foliage lasts, the better the bulbs will grow the following year.
Hardy bulbs are treated as perennials, left in the ground year after year. Every three to four years they may need to be replaced or divided if they start to crowd each other and are not blooming well.
If you have to move the bulbs because they are crowding or for some other reason, the best time is just after the foliage has yellowed and withered.
- Carefully dig up the bulbs, shake off any loose soil and roots, discard any small ones and store the remainder in a cool, dry, well-ventilated place until fall planting time.
- Keep the bulbs out of direct sunlight and check them periodically for any disease.
- Old onion sacks or shallow seed trays work well for storing the bulbs over summer.
Bulbs generally have few insect or disease problems. Some reasons for poor flowering the first year could be:
- Bulbs were planted too shallow, too late in the season or were not hardy for your region.
- Bulbs were dug up by animals such as squirrels, chipmunks or mice.
- Bulbs rotted. Bulb rots are usually caused by:
- Using fertilizers excessively high in nitrogen.
- Fresh manure.
- Wet soil conditions, usually caused by poor drainage or heavy clay soils.
- Poor quality, bruised or cut bulbs.
If bulbs flowered the first year but not the second:
- The area may be too shady.
- Leaves may have been removed before they yellowed and withered naturally.
- When cutting flowers, leave as much foliage behind as possible.
Tender bulbs and their care
Tender Bulbs for U.S.D.A. Cold Hardiness Zones 3 & 4
Scientific name
Common name
Begonia x tuberhybrida
Tuberous begonia
Caladium x hortulanum
Caladium
Canna x generalis
Canna
Dahlia hybrids
Dahlia
Freesia x hybrida
Freesia
Gladiolus hybrids
Gladiolus
Oxalis purpurea
Oxalis
Zantedeschia spp.
Calla lily
Digging bulbs
- Dig up tender bulbs from soil after the foliage dries up or is killed by frost.
- An exception to this is Peruvian daffodil (ismene or Hymenocallis), which should be dug before frost damages the plant.
- Loosen roots gently with a garden fork or spade by digging several inches away from the base of the plants. This will prevent cutting off the roots.
- With dahlias or other large plants, loosen the soil on all sides of the plant before lifting the clump of roots and soil.
- In all cases, avoid cutting, breaking or "skinning" the fleshy structure as diseases can easily contaminate plants cuts and bruises, causing rotting and death.
Cleaning bulbs
- Some plants are best washed gently with a hose (e.g. dahlias).
- Put hardware cloth (or a large mesh screen) across the top of a large garbage can and set a clump of dahlias or cannas on the hardware cloth or screen and wash the soil into the garbage can.
- This eliminates mess and the soil and water can be returned to the garden so it is not completely wasted.
- You also can reuse the soil by putting it on the compost pile.
- Gladiolus corms are best left unwashed and allowed to dry. After drying, the soil may be gently removed.
Curing bulbs
- For most species (dahlias, cannas, calla, caladium), the curing or drying period should be between 1 to 3 days, depending on temperature.
- Curing should be done in a room or area away from direct sunlight or drying winds.
- Long-term curing for gladiolus, tigridia and oxalis should be approximately 3 weeks.
- For gladiolus, the old corm and cormels should be removed.
- Drying and curing temperatures should be 60 - 70° in a dry, well-ventilated area.
Pest management
- Before storing corms, inspect for insects or diseases.
- Dust with an insecticide-fungicide mixture labeled for the specific plant.
Storing bulbs
- Store tender bulbs in cool (an average of 40° F), dry conditions.
- Dig 6 to 8 weeks after bloom, when the leaves turn yellow.
- Exceptions to the average temperature for storing tender bulbs are:
- Peruvian daffodil (Hymenocallis narcissifoli) - store at 60 - 65° F.
- Tuberose (Polianthes tuberosa) - store at 55 - 65° F.
- Label stored plant material carefully.
- In case of gladiolus and similar plants, place the corm in a small paper bag which has been properly labeled.
Larger materials, like dahlias or canna can be handled in several ways.
- Write directly on the fleshy root with a permanent felt marking pen.
- If this is done on large clumps the cultivar name should be written on several roots rather than on just one, because in storage a root may break off of the main clump.
- Wood and wire tree labels also work very well for labeling.
- Cultivar name or other important identifying characteristics should be written on the label and also recorded in a notebook or in some other way.
Remember to periodically check stored bulbs, tubers and roots during the storage season. Remove any damaged or rotting material.
In cases where tuberous roots like dahlias have some rot, cut back until you reach clean white, fleshy tissue again. These structures may need attention and care even during their dormant period.
Reviewed in 2024


