Quick facts
- Pears are related to apples, but can be easier to grow than apples.
- Two varieties are generally needed for successful pollination and fruit set.
- They can be grown organically in Minnesota.
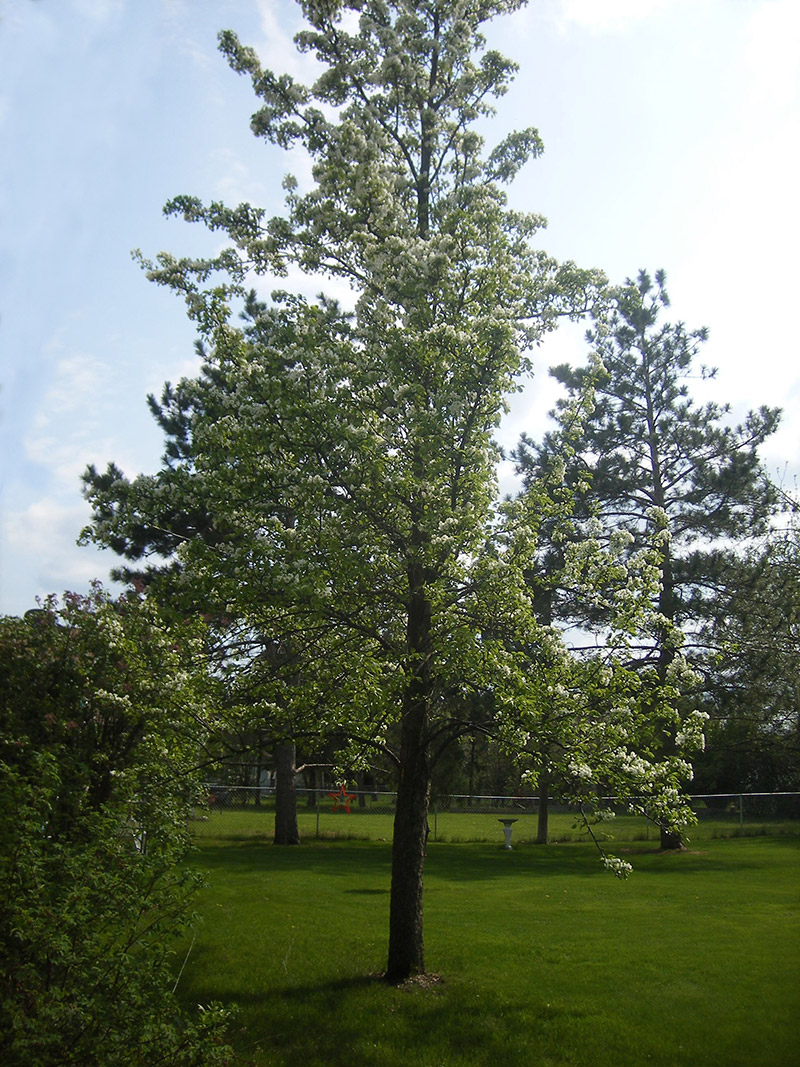
- Pear trees require full sun to produce the most fruit.
- Prune annually to keep the tree healthy, productive and looking its best.
- It can take 3 to 10 years for trees to begin flowering and producing fruit.
- Mature pear trees are large and produce a lot of fruit in a short window of time.
- Fruit should be picked at a mature stage and then allowed to ripen indoors.
Pear trees originated in central Asia. They are relatives of the apple and are propagated and managed in a very similar way. But pears are in some ways easier to grow than apples. Apples can be pestered by many insects and diseases, but pears are relatively trouble-free.
Pear trees can be grown organically simply because they don't require any sprays to keep them healthy and pest-free. Fire blight is the only disease that challenges pear trees, but this is easy to diagnose and manage.
Commercial pear production in the U.S. is centered in Washington and California, where varieties such as Bartlett and Bosc are grown. Those varieties would not survive winters in the average Minnesota garden.
Thanks to cold climate fruit breeders at the University of Minnesota and other northern research stations, there are several varieties hardy to our region. Most are best suited to USDA zone 4, but there are a couple of varieties that will grow well in USDA zone 3.
If you want consistent fruit it is best to plant two pear varieties with compatible pollen or be certain there is a pear tree in a neighbor's yard. If you're a fan of pears, find an open space in your yard for a couple of these beautiful trees and you'll have fruit for years to come.
Caring for pear trees through the seasons
March: For existing trees, prune before growth begins and after the coldest weather has passed.
April, May: If last year's growth was less than 12 inches, apply compost around the base of the tree.
April, May: Plant bare root trees as soon as the soil can be worked.
May, June: Plant potted trees after the threat of frost has passed.
May through October: Water trees as you would any other tree in your yard, particularly during dry spells.
June, July: Pick off the smallest pears to encourage larger fruit.
August through October: Harvest.
October, November: Rake and compost fallen leaves and fruit.
November: Apply tree wrap in late fall to prevent winter injury.
November through March: Watch for deer and vole damage; put fencing around trees if needed.
Getting started
Select the right tree for your location and use these step-by-step instructions to plant and care for your young trees.
If you purchase a tree at a local nursery, most likely it will be a potted tree.
If you can't find pear trees at local nurseries, you can order trees online. Most online tree orders will be shipped as dormant, bare-root trees in early spring. You can usually order bare-root trees between late fall and early spring, and the nurseries will ship at the appropriate time for your area.
Most cold-hardy pear trees are grafted onto hardy seedling rootstocks. Seedling rootstocks produce standard-size trees, so most hardy pear trees grow from 25-40 feet tall.
There are very few dwarfing rootstocks for pears that are winter-hardy. A few nurseries offer semi-dwarf hardy pear trees, but these are a little harder to find than the standard size.
Semi-dwarfing rootstocks for hardy pears are often from the Old Home x Farmingdale series, or OH x F. If you find a tree grafted onto this rootstock you can be very sure it will survive in Minnesota and produce a tree that tops out at about 20 feet tall.
Varieties
Most pear trees need pollen from another variety to set fruit. But some varieties have been known to set adequate fruit without a second variety. The reason for this is not well understood and fruiting is unreliable.
Pear varieties recommended for northern gardens
| Variety | Hardiness to zones 4 and 3 | Fireblight resistance | Harvest | Description |
|---|---|---|---|---|
| Golden Spice (1949) | Excellent to very good | Very resistant | Late August | Recommended as a pollen source for Ure. Small 1 3/4 inch fruit. Not recommended for zone 4 where other, better flavored varieties grow well. Grows to 20 feet tall. Good for canning. |
| Gourmet | Very good to poor | Tolerant | Mid to late September | Medium-sized fruit that are juicy and sweet with a firm, crisp texture. Cannot be used to pollinate a second pear tree. |
| Juicy Jewel (2021) | Very good in Zone 4, not recommended for Zone 3 | Mid-August | Best for fresh eating. | Asian-type pear. Fruit is attractive with an occasional orange-pink blush. Should be picked ripe, while crisp and with a yellow-green background color. May be used as a pollinator for Summercrisp and vice versa. Available by 2022 or 2023. |
| Luscious | Very good to poor | Tolerant | Mid to late September | Medium-small fruits with a flavor similar to Bartlett. Texture is firm but melting. Cannot be used as a pollen source for another tree. |
| Parker (1934) | Good to poor | Susceptible | Mid August | Fruit similar in size, flavor and texture to Bartlett. May set some fruit without a second variety. Good pollenizer for Luscious. May not be hardy north of the Twin Cities. |
| Patten | Very good to poor | Susceptible | Mid to late September | Large fruit has excellent fresh eating quality, similar to Bartlett. Hardiness is slightly better than Parker. May produce some fruit without a second variety. |
| Summercrisp (1985) | Very good to poor | Resistant | Mid August | Medium-sized, red-blushed fruit with mild flavor and crisp texture strongly reminiscent of an Asian pear. |
| Ure | Very good to good | Susceptible | Mid August | Smaller tree (to 15 feet) produces small Bartlett-type fruit with good flavor. In areas too cold for other pear varieties, Ure can be grown with Golden Spice for pollen. |
Preparation
Planting and caring for pear trees is similar to that of apple trees.
- Have your soil tested
- Soil should be slightly acidic, pH 6 to 7
- Soil should be well-drained, water does not stand for long after a rain
- Plant in full sun away from structures or other trees
- Remember, most pear trees will be very large when mature
Planting
- Dig a hole no deeper than the root ball and about twice as wide.
- Mix in up to 1/3 by volume compost, peat moss, or other organic matter. Most of what goes back in the planting hole should be the soil you took out of the hole.
- There is no need to add fertilizer to the hole.
- If planting bare-root trees, remove encircling roots or J-shaped roots that could eventually strangle the trunk.
- For potted trees, inspect the root systems for encircling woody roots.
- If woody roots are wrapped around in a circle, straighten them or make several cuts through the root ball before planting.
- This helps the plant produce a stronger root system and prevents the formation of girdling roots that can weaken the tree.
- Position the tree so that the graft union is 2 to 4 inches above the soil line.
- The graft union is a swelling where the variety meets the rootstock.
- If the graft union is placed close to or below the soil line, the variety will root, causing trees to grow to full size.
- Spread the roots, making sure none are bent. Have someone help you get the tree standing up straight.
- Begin replacing soil, removing air pockets as you go.
- After the hole is filled, tamp gently and water thoroughly to remove remaining air pockets.
- The soil may settle an inch or two. If so, add more soil to the proper level.
Protect the trunk
Planting time is a good time to install a tree guard to protect your tree from winter injury and bark chewing by small mammals. There are many available, from thick paper wraps to plastic spiral and corrugated types.
Tree guards keep voles and rabbits from feeding on the bark. Guards also reflect sunlight from the trunk, which helps prevent sunscald in winter.
For the first few years, it's important to protect the trunk of your pear tree. Once the tree has rough and flaky mature bark, neither winter sun nor chewing animals are likely to harm it, so tree guards will not be necessary.
How to keep your pear trees healthy and productive
Watering, weeding, mulching and pruning will keep your pear trees healthy for years to come.
Watering
Water the tree with a slow sprinkler after planting and fill in if the soil settles. Newly planted trees need to be watered every week for the first year. If the soil seems moist, your tree probably has plenty of water.
Don't wait for leaves to droop before watering. Remember, overwatering can be just as damaging as under-watering. Roots need to be moist but not waterlogged.
As the tree grows, the roots will be deeper into the soil and will generally not require as much watering. If it's a particularly dry season, give your tree a deep watering every once in a while until the leaves begin to fall.
Support
Pear trees benefit from a stake at planting. Tying the tree to the stake encourages a straight trunk and allows the roots to become well-established. The stake can be removed after a few years.
Fertilizer and mulch
Most fruit trees do not need any fertilizer the year they are planted.
The only nutrient that can be limiting for plant growth in gardens is nitrogen. If trees are growing between 18 and 24 inches in new growth each year, then there is plenty of nitrogen in the soil. You can always apply compost as a mulch around the tree base if tree growth begins to slow down.
Keep a 3-4-inch layer of mulch around the base of your fruit trees. This helps moderate the soil temperature and retain moisture in the soil. Mulch also helps prevent weeds and grasses from growing around the base of the tree. Just remember, keep mulch a few inches from the trunk to prevent trunk rots and damage from rodents.
Weeding
Fruit trees should not have grass or other plants growing up to the base.
Pull weeds regularly and cut away any root suckers that may sprout around the base of the tree. Again, a few inches of mulch will help reduce the time you spend weeding around your fruit trees.
Pruning
Initial pruning
A bit of simple pruning should be done when the tree is first planted.
- If you plant a larger tree, remove any limbs originating from the base of the tree and any branches lower than 24 inches. If there are 2 or more branches competing to be the leader, choose one and remove the others.
- Prune an unfeathered tree (one with no strong branches) to about 30 inches tall, just above a bud. Make this cut at a 45-degree angle.
- For a feathered tree (one with several branches), prune out any branches that are competing with the leader, that look weak, or that grow at an odd angle. Leave 2 to 3 strong, well-spaced branches.
- If your tree has numerous branches, select 4 or 5 scaffold branches from those that remain, pruning out any other branches that are growing just above or just below scaffolds. The scaffold branches are the main branches that form the shape of the tree. They should have wide angles, at least 60 degrees relative to the trunk.
- If you have purchased a small tree with little or no branches, prune the trunk to about 30 inches above the ground. This will cause branching, resulting in scaffold branch options the following year. If the tree has a few small branches, choose 2 or 3 sturdy ones at least 18 inches from the ground to keep as scaffolds and remove all others.
Regular pruning after the first year
Pruning pear trees is very similar to pruning apple trees. Mainly, you want to prune a tree to have well-spaced branches and a balanced appearance, while eliminating problem branches (those that are broken, diseased or dead).
- Fruit trees should be pruned every year in late winter or early spring, after the coldest weather is past and before growth begins.
- Prune minimally, especially with young trees, as excessive pruning will delay or reduce fruiting and create too much leafy growth.
- Most pear trees are pruned and trained to allow a central, main stem, or leader, be the foundation of the tree off of which side branches, or scaffolds grow. The tree ends up with a conical or pyramid form. This is called the central leader pruning method and it makes for a compact, balanced, easily managed tree with fruit that has maximum access to sunlight and air circulation.
- Once you choose the first set of scaffold branches, select a second set above it. Scaffold branches should be spaced about 12 inches apart. Always keep the pyramid shape in mind when pruning.
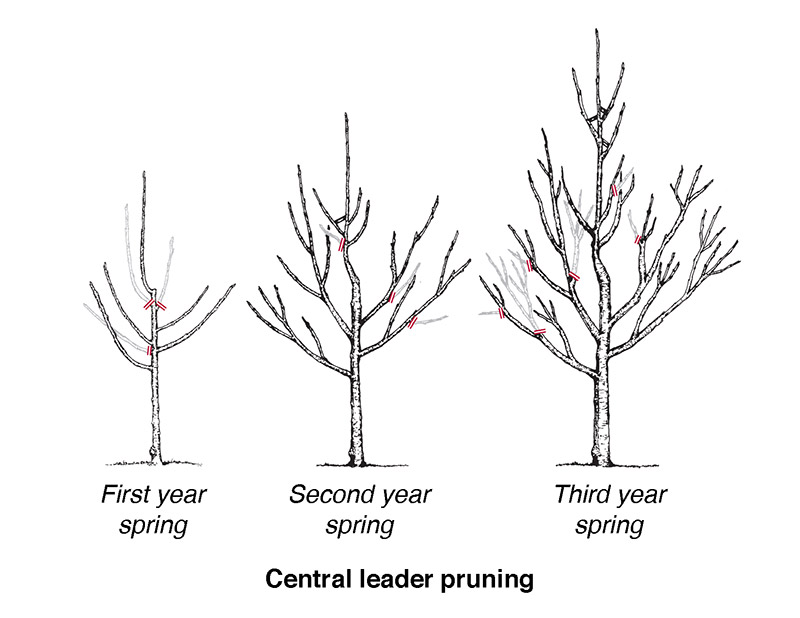
General pruning guidelines
- Remove diseased, broken or dead branches
- Remove any downward-growing branches
- If two limbs are crossed, entangled or otherwise competing, remove one of them completely at its base
- Remove any limbs along the trunk that are getting bigger in diameter than the trunk
- Remove suckers coming up from the roots or low on the trunk
- Remove watersprouts, which are vigorous vertical branches
- Make pruning cuts close to the branch collar at the base of the limb
- For larger limbs, start the cut from the underside of the limb to avoid tearing the bark
- Remove large limbs first, starting with the top of the tree
- Thinning cuts remove entire branches at the branch collar and are the recommended type of cut
- Heading cuts remove only part of a branch and encourage vegetation growth below the cut, and are not as common
Renovating old trees
Have you moved into a house that has an old, overgrown pear tree? Are the branches overlapping and going every which way? Don't lose hope. This tree is probably fine, it just needs a little work to get it back in shape and productive again.
Reclaiming a mature pear tree that has been neglected for several years can be a challenge, and will take a few years of pruning to make the tree productive again. Here are a few guidelines for renovating a neglected tree:
- Decide which branch is or will be the leader
- Then decide which branches you are going to save based on the branch position around the trunk
- At this stage, pruning out a few large branches in year one will open the tree up and increase light and air flow
- Don't prune too much or the tree will put all its energy into making new branches and not fruit
- During year 2, make a few more decisions on where branches should remain and remove a few more
- Follow the general pruning guidelines to prune out branches that are diseased or broken
Harvest and storage
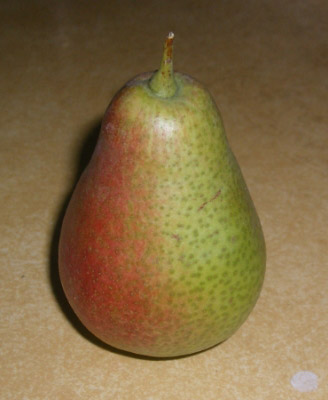
Harvest pears when
- Skin color turns from dark green to lighter green.
- Dots on the skin turn brown (not all varieties do this).
- Skin develops a smoother, waxy look and feel.
The most common mistake novice pear growers make is to let the fruit ripen on the tree. Fruit that ripens on the tree ends up gritty and unpleasant. Instead, fruit should be picked at a mature stage and then allowed to ripen indoors.
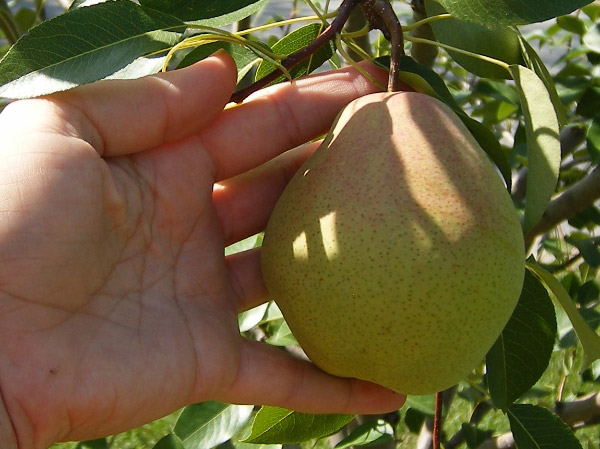
To harvest a pear, gently take the fruit in the palm of your hand and lift and twist in a single motion. Or use one hand to hold the spur and the other hand to lift and twist the fruit.
Don't pull or yank the fruit, which may damage the small woody spur where the fruit stem is attached, taking with it next year's flower buds.
Quickly refrigerate harvested fruit in perforated plastic bags or a loosely covered container. This will help increase humidity levels around the fruit.
To fully ripen the fruit, remove it from the refrigerator and allow it to sit at room temperature for a few days. When the fruit turns a more golden color and the flesh at the stem end yields to thumb pressure, the fruit is ready to eat.
The exception to these harvest guidelines is Summercrisp, which should be picked when still green with a red blush and should not be ripened before eating.
Protecting trees through the winter
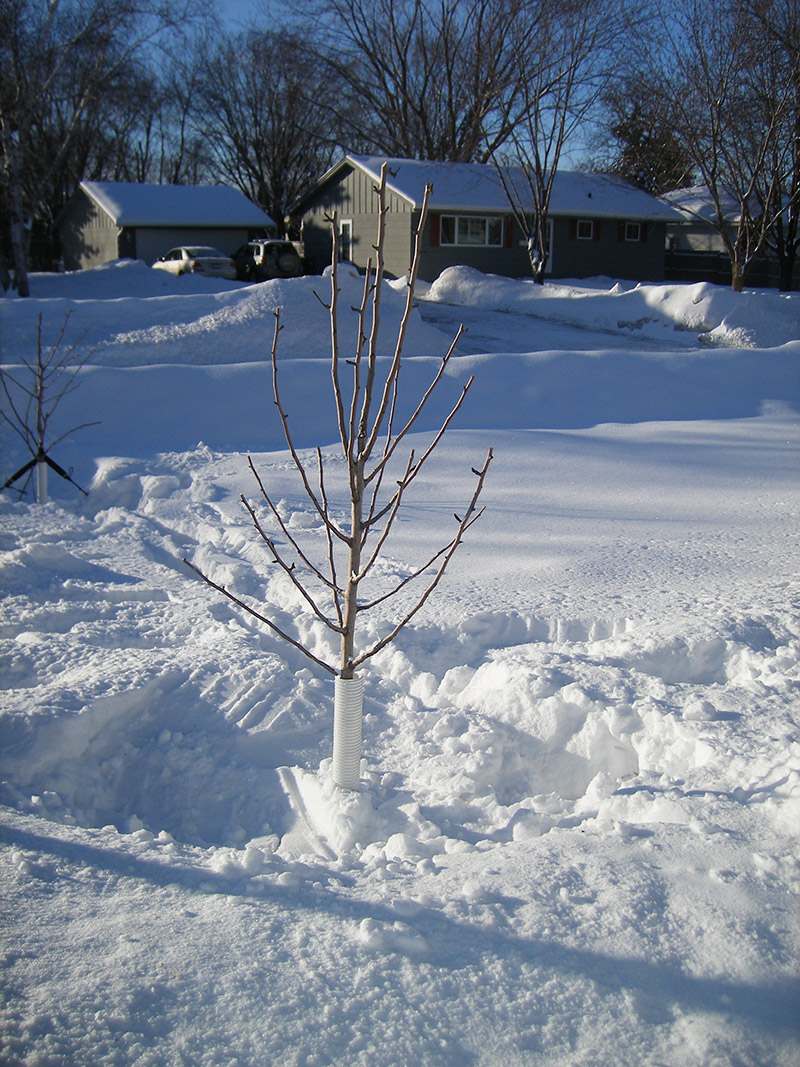
Tree guards or tree wraps can help prevent winter injury, or sunscald, to young trees. The white material reflects sunlight from the trunk, which helps prevent it from heating up on a cold, sunny winter day.
If the bark temperature gets above freezing, water in the tissues under the bark becomes liquid and begins to flow through the cells. When the sun goes down or behind a cloud, the liquid water suddenly freezes, damaging the cells and sometimes killing the tissue on one side of the trunk.
Tree guards can be removed once the bark becomes thick and scaly, after about 6 to 8 years. In the meantime, loosen the guard periodically to allow the tree to expand.
Plastic tree guards can be removed for the growing season and put back on in fall.
Diseases, insects and other challenges
Fire blight is the major disease of pears in Minnesota.
In other areas of the U.S., pear trees are susceptible to a number of insect problems. Because these trees are not common in Minnesota, insect problems are usually not severe for home gardeners.
As more people add pears to their gardens, this may change. But for now, promptly removing and destroying fallen fruit and leaves, and pruning to promote good airflow through the tree are all that is normally needed to grow a satisfying crop in most years.
Fire blight
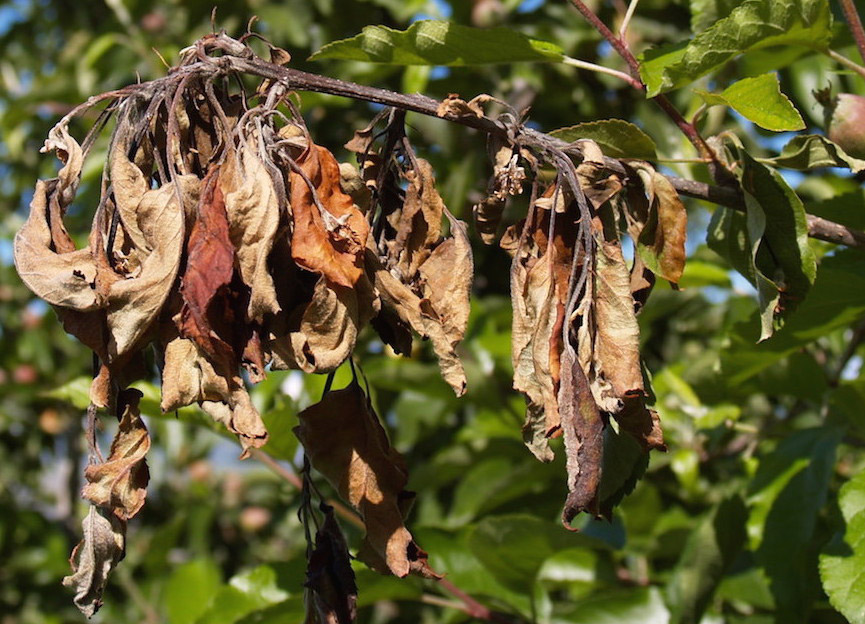
Fire blight is the major disease of pears in Minnesota.
The tell-tale sign of fireblight is the brown shepherd's crook appearance of shoots.
Too much nitrogen fertilizer, including compost, can cause fast new growth that is very susceptible to fire blight. To minimize fireblight, don't over-fertilize, and don't let young shoots grow more than three feet in varieties of susceptible pears.
Water sprouts or suckers should be removed promptly on susceptible varieties. Do not prune while the tree is in bloom and up to two weeks after blooming.
Prune diseased shoots immediately if your pear tree is exhibiting symptoms of fire blight. When pruning a diseased shoot, cut at least 6 inches below where you see discolored bark. After each cut, disinfect pruning tools in a mixture of 1 part water to 3 parts denatured alcohol or a mixture of 1 part chlorine bleach to 9 parts water. You can also use an anti-bacterial cleaner such as Lysol or Listerine. Discard or destroy diseased shoots.
This bacterial disease can spread quickly and damage or even kill trees. But, the observant gardener can keep this problem from getting out of hand. The best solution is to choose pear varieties with some resistance to the disease.
Bacteria like warm, humid environments, so keep trees pruned and the tree canopy open to allow air to reach all leaves so they dry quickly after rain.
Insects and other creatures
Although pear trees are generally susceptible to a number of insect problems, the fact that these trees are relatively uncommon in the Minnesota landscape often prevents these problems from becoming severe for home gardeners. As more people add pears to their gardens, this situation may change.
For now, however, sanitation (promptly removing and destroying fallen fruit and leaves) and pruning to promote good airflow through the tree are all that is normally needed to obtain a satisfying crop in most years.
Japanese beetles are becoming a nuisance to pear trees just as they are to many other plants in Minnesota. Look for them in late June to early July. As soon as you see one, you can be sure there will be more.
- Take a bucket of soapy water out to your tree and flick the beetles into the bucket.
- Wait for them to die, then dispose of them.
- Do this every couple of days for a few weeks and that should take care of them.
Animal damage
Small mammals can be problematic to fruit trees, especially young trees. Voles and rabbits feed on bark at the base of the tree, and even young branches when they can reach them. Plastic tree guards can prevent some of this damage. Make sure the tree guard is pushed down into the soil to a depth of two inches. This will keep voles from burrowing under them to get at the tree.
Another option is to put a hardware cloth cage around the base of the tree. Like a plastic tree guard, it should be pushed into the soil to prevent the entry of voles. It should extend up the trunk to just below the first branch and should not fit tightly around the tree. Leave a few inches of room for the tree to expand. Once the tree has rough and flaky mature bark, chewing animals will not harm it, so tree guards will not be necessary.
If larger animals such as deer pose a problem, a cage of fencing may be required until the tree is old enough to withstand occasional nibbling. Make the fence a little taller than the tree, and wide enough so it does not restrict or rub against the branches.
Reviewed in 2024