Quick facts
- Hostas are herbaceous perennials, hardy to Zones 3 or 4 depending on the variety.
- Sometimes referred to as the plantain lily, hostas have fleshy roots and short spreading rhizomes.
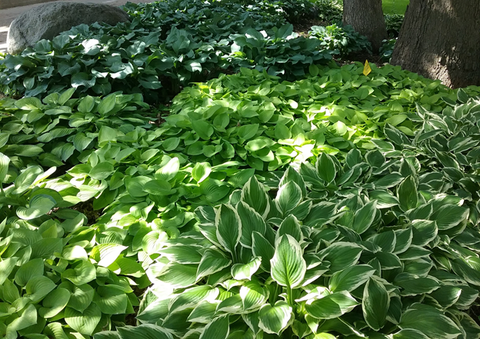
- In spring, broad leaves emerge from a central crown and develop into a mounded form that helps to cover the soil and suppress weed growth with their shade.
- Depending on growing conditions and variety, individual plants range in size from six inches high and a foot or less across to 3 to 4 feet high and 5 to 6 feet across.
Growing hostas in Minnesota
If there was ever a popularity contest for perennials, the hosta would surely prevail.
Reliable and hardy with countless combinations of leaf color, shape, and texture, hostas are perennials that have won the hearts of northern gardeners with their fabulous foliage.
Hostas can survive in deep shade and can be planted in large masses for reliable color and texture in the garden. They are adaptable to many sites, and are generally easy to grow even for inexperienced gardeners.
Hosta leaves
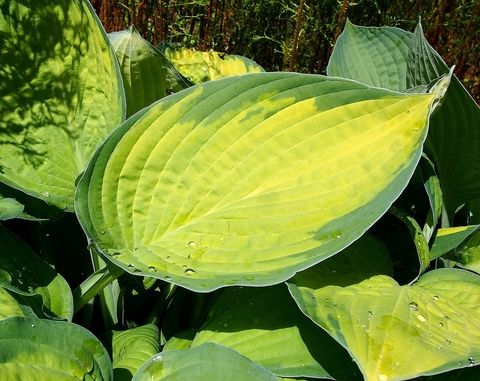
- Leaves come in colors from bright green to gold and blue tones.
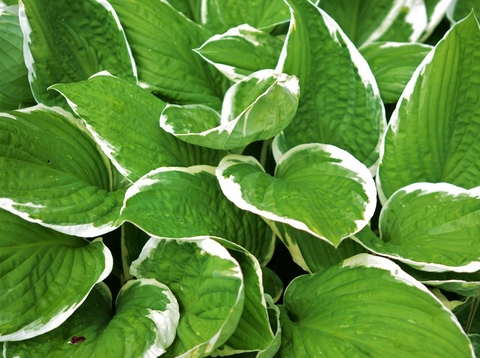
- They can have an edging or a center of white, cream or gold, or splashes of color.
- Leaf texture can be smooth, veined or puckered.
- Leaf size ranges from a few inches long to a few feet long.
- Leaf shapes can be heart-shaped, lance-like or cupped.
Hosta flowers
- Hosta flowers provide great ornamental value.
- The flower stalks, called 'racemes', hold bell-like blossoms ranging from white to lavender to purple to bluish hues.
- Some flowers are very fragrant and attractive to hummingbirds and bees.
Site and soil
Hostas thrive in sites where filtered or dappled shade is available for much of the day, but they can survive in deep shade (less than 4 hours of sun a day).
Too dark a location will lead to slower growth rates.
Yellow and gold hostas will benefit from 2 to 3 hours of morning sun to develop a richer leaf color.
Blue hostas have a waxy coating on their leaves, much like the needles on blue spruce, and require a shadier site to avoid leaf burn and bleaching.
- Brown, scorched leaf surfaces or leaf tips on a hosta is a symptom of sunscald. Move the plant to a shadier location or provide more water.
- Hostas prefer rich, moist soil that is high in organic matter and well-drained, but they can survive in a wide range of soils.
Adding organic materials such as peat, composted manure, or leaves will help improve soil structure.
A soil test every 3 to 5 years helps determine the need for soil amendments and fertilizer.
Planting
Hostas can be planted throughout the growing season, but spring is generally the best time to plant. Hostas planted in summer will need more water until their root systems have become established.
You can buy potted plants anytime in the growing season from garden centers or bare-root plants from mail-order sources, which are more affordable and available in early spring.
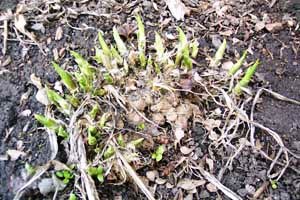
- When planting dormant, bare root divisions in the spring, place bare root plants with the crown (the root-shoot junction) even with the surrounding soil and the growing tips visible at the soil surface.
- Potted plants should generally be planted at the same soil level as in the pot.
- After planting either type, gently firm soil around the plant and water it.
Transplanting and dividing
It is not necessary to divide mature hostas for plant health. But dividing plants can provide a neater appearance and make more hostas.
Hostas have fleshy roots that hold moisture and nutrients to help new divisions establish successfully.
To divide hostas:
- Start in spring once the ‘eyes’ or growing tips start to emerge from the ground. Hostas can be divided later in the season, although they may show more damage for the rest of the season.
- Dig up the clump.
- Divide into sections with a sharp shovel or knife. With smaller plants, it may be possible to gently pull apart the plants instead.
- Leave as much of the root as possible attached to each crown or plant.
- Space new divisions in their new planting bed considering their mature size.
- Plant the new hostas at the same soil level as they were previously.
- Water well until established.
How to care for hostas
- Consistent, even moisture equivalent to 1 inch of water per week is considered best for hostas.
- Deeper infrequent watering is better than frequent shallow applications.
- Hostas planted in dry shade, sunny locations, or beneath shallow-rooted trees, such as maples or spruce, may need additional water.
- Organic mulches, such as shredded bark, shredded leaves, or pine needles, will help conserve the moisture needed for hostas.
- Apply mulch after the soil warms in late spring to early summer to maintain a 2- to 4-inch layer; keep mulch away from the plant’s central crown.
- If a soil test indicates fertilizer is needed, apply it twice during the season for optimum growth.
- Apply first in spring as leaves emerge from the ground.
- Apply once more before flowering.
- Discontinue fertilizing after the end of July as it could interfere with the plant’s ability to prepare for winter.
- Deadheading, or removing flowers, can be done at different stages.
- Trim off hosta flowers before they mature to not distract from the leaves.
- Wait until the blooms have died then cut the stalk off down to the crown of the plant.
- Flowers should not be allowed to set seed because this can defer energy at the expense of leaf or root development.
- Pruning is unnecessary during the growing season other than trimming off yellowed or hail-damaged leaves or dead flowers for a tidier appearance.
- Rake up and compost or dispose of dead leaves in late fall to reduce the build-up of disease and insect pests. If diseases have been an issue, discard infected leaves.
- Winter protection is generally not necessary for hostas. Provide some extra mulch for winter protection, especially for plants transplanted late in the season.
- Wait until the ground has frozen to about 3 inches to apply mulch.
- Remove excess mulch in the spring as the weather warms making sure it is away from the crown of the plants to avoid crown rot.
Common hosta problems
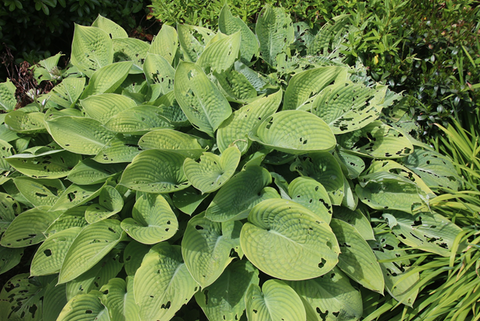
Common problems of hostas include slugs and deer.
In urban environments where native plants and crops aren't available, the home landscape may become the major source of food for deer.
Reduce damage to the home landscape by growing plants that deer find unattractive, fencing the deer out, or using repellents.
- Hungry deer will eat almost anything.
- Young, tender plants are more likely to be damaged than older, tougher plants.
- Don't mix plants deer prefer among those they dislike. They'll trample the plants they dislike to get to those they prefer.
Less common problems include variegated cutworm, viruses, earwigs, crown rot, foliar nematodes, leaf spots, mice and voles.
Hail
Hail damage is heartbreaking for hosta gardeners. Fortunately, most hostas will recover in time.
- Early in the season remove shredded leaves, water if necessary, and wait for new growth.
- Later in the season, it may be necessary to live with some ragged leaves until new growth appears the following season.
Ideas for using hostas
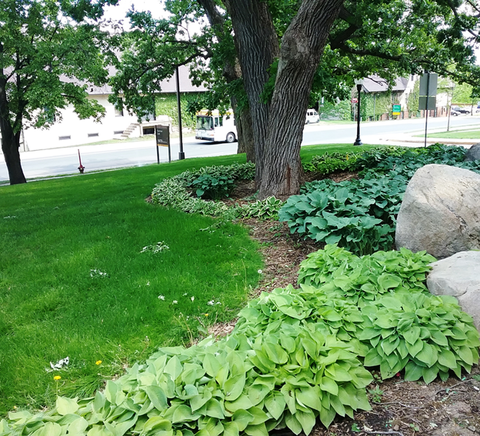
- Brighten shady garden areas with gold or variegated hostas.
- Use hostas to bridge gaps in seasonal perennial bloom.
- Groups of variegated hostas with white or cream margins and other white flowering plants glow in “moonlight gardens” in the evenings.
- Hosta leaves emerge just as spring bulb foliage starts to fade, hiding it from view.
- A single hosta in a container is dramatic and sculptural. Hostas look great in containers paired with other foliage plants or annuals. Remember to provide adequate water.
- Plant fragrant hostas close to paths and walkways for best appreciation.
- Use small hostas for edging along walkways and flower borders.
- Hosta leaves and flowers are attractive in floral arrangements.
Reviewed in 2024


