Spring management of cover crops is as varied as farming operations across Minnesota. A farmer’s plan of action will largely be determined by two things:
The reason for using cover crops in the first place.
The specific cover crops planted.
Possible scenarios
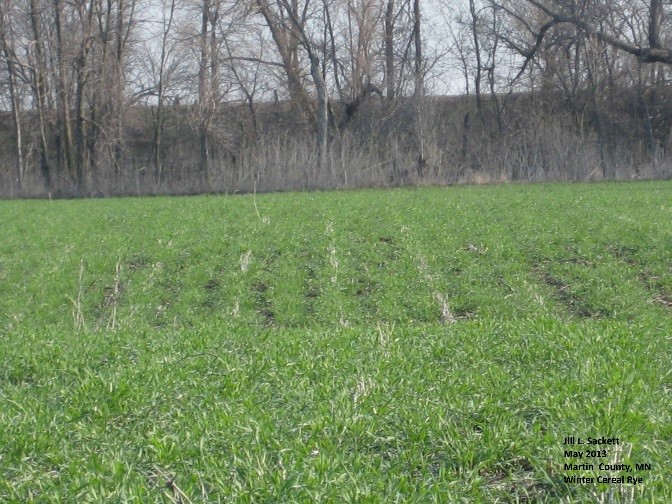
A farmer who wants to graze livestock in the spring may have planted winter cereal rye as a cover crop. Spring management in this situation will likely include letting the cattle graze the winter cereal rye for a few weeks, terminating the cover crop with an herbicide or tillage, and planting a cash crop that can successfully be grown with a late May planting date.
A second example might be a corn or soybean farmer who’s new to cover crops and interested in interseeding annual ryegrass and red clover into standing corn in mid-June at the V6 stage of corn (six corn leaves have visible leaf collars).
While red clover regularly overwinters in Minnesota, annual ryegrass winter survival depends on planting date and winter weather conditions. If planted in June, there’s a good chance that annual ryegrass will overwinter to some extent.
Spring management in this situation would likely include waiting until air and soil temperatures reach the requirements on the herbicide label for application and when the annual ryegrass and red clover ideally are 4 to 8 inches tall.
Cover crop termination
Cover crops that typically don’t overwinter include spring small grains (e.g., oats, spring wheat), some legumes (e.g., crimson clover, field pea) and some non-leguminous broadleaves (e.g., buckwheat, oilseed radish).
However, be aware that some winter cover crops that are normally winter-killed may survive into the spring. For example, some cold-tolerant cover crops like turnips may overwinter if there’s plenty of snow cover. There may be a few scattered plants or a patch in a protected area.
Another possibility is spring germination of seed that didn’t germinate in the fall. When this occurs, handle the cover crop as if it were a winter-hardy cover. Winter-hardy cover crops, including winter cereal rye, winter wheat and hairy vetch, go dormant over the winter and begin growing again in the spring.
Poor fall growth or harsh, open winters may result in winter-kill for some of these plants. Spotty or limited spring growth can be especially common with hairy vetch.
Approaches to termination
If cover crops are winter-hardy, have a plan in place that includes chemical and/or mechanical termination in the spring.
Non-selective herbicides are commonly used to terminate cover crops in the spring. This is especially true where a mix of grass and broadleaf species have been planted. Non-selective herbicide options include:
- Glyphosate.
- Glufosinate (Liberty®)
- Paraquat (Gramoxone®)
Combinations of glyphosate with 2,4-D or dicamba can enhance broadleaf cover crop control.
A general guideline for successful termination is to spray when the cover crop is about 4 to 8 inches tall.
Younger, smaller plants are easier to kill and tend to have a lower carbon-to-nitrogen ratio, which results in faster decomposition (Table 1). Once plants reach reproductive stages, control with herbicides can be difficult.
Table 1: Approximate carbon-to-nitrogen ratios of common crops and cover crops
| Organic material | Carbon-to-nitrogen ratio |
|---|---|
| Wheat straw | 80:1 |
| Corn stover | 57:1 |
| Rye cover crop (at anthesis) | 37:1 |
| Rye cover crop (vegetative) | 26:1 |
| Young alfalfa hay | 13:1 |
| Hairy vetch (vegetative) | 11:1 |
| Soil microbes | 8:1 |
Cool spring temperatures can compromise chemical control. When conditions are cool, cover crops don't actively grow. This limits herbicide uptake and ultimately, control.
Full labeled rates can enhance control. However, a second herbicide application may be needed to fully control the cover crop if:
Cover crops are allowed to grow longer in the spring in order to graze it or to take up more nitrogen.
The spring weather isn’t cooperating.
Always consult product labels before using an herbicide and check for any restrictions to ensure the application will not impact your cropping rotation or forage plans.
Mechanical methods of cover crop termination primarily include using tillage equipment, a roller/crimper or a mower. You can use these methods alone, in combination with one another, or with an herbicide.
Different spring tillage equipment options can affect termination success. A field cultivator operating at a 3- to 4-inch depth will cut most cover crop roots and bury the plant, resulting in better termination.
This isn’t necessarily true for coulter carts or vertical tillage equipment, because these move soil up and down and have little effect on cover crop or weed termination. One pass of tillage equipment may not result in enough soil and root disturbance to kill the cover crop, so be prepared to take two passes, if needed.
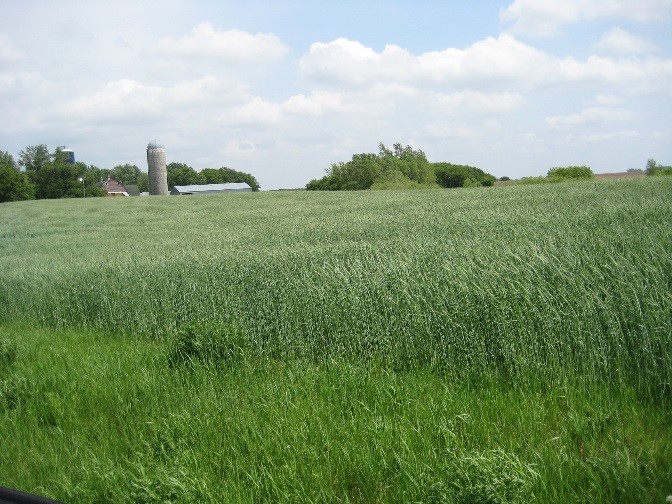
A roller crimper or a mower can also successfully terminate winter-hardy cover crops. However, these methods have the best chance for success when cover crops have reached maturity, i.e., the flowering or heading stage of growth.
This often puts the timing of these two termination methods into late-May and may delay planting of the cash crop. If you use a roller crimper for cover crop termination, plant the cash crop in the same direction and use properly calibrated equipment that has sufficient attachments or down-pressure to move aside or cut through the residue.
Residue management
The amount of residue left in the spring will depend on which cover crops you used and when you planted them.
Brassicas and legumes break down and begin decomposing faster than grasses because of a lower carbon-to-nitrogen ratio in the plant material (see Table 1 above).
One exception to this is if the brassicas are allowed to mature and flower. In this case, they’ll become stemmy, increasing the amount of time it takes to decompose.
The age of the cover crop stand also affects decomposition rate. The earlier the cover crop is planted, the more mature it will be at termination. This results in a higher carbon-to-nitrogen ratio and slower decomposition.
Additionally, one of the keys to spring management of cover crop residue is planter set-up. Calibrate your planter so it can sufficiently handle the cover crop residue situation.
The planter may need to be recalibrated, not just between fields, but within the field as well. This is especially true in areas with measurable changes in residue type or amount.
Timing of termination and planting
The general recommendation is to wait seven to 14 days after cover crop termination before planting the year’s cash crop. This is particularly true when corn follows the cover crop. This waiting period allows some time for the cover crop residue to begin breaking down and for surface moisture to recharge.
However, there have been cases when farmers successfully planted into standing cover crops or planted within days or hours of spraying.
Keep in mind that the USDA-NRCS Cover Crop Termination Guidelines specify termination timing for those involved in USDA programs such as EQIP or crop insurance. For most of Minnesota, these guidelines state that cover crops should be terminated at or before planting. However, in parts of eastern Minnesota, the guidelines call for cover crop termination at or within 5 days of planting, but before crop emergence.
Be on the lookout for potential spring pest issues in cover crop fields, particularly with winter-hardy cover crops. Cover crops can provide a suitable overwintering site for pests like common stalk borer. It can also be an attractive egg-laying site for pests like true armyworm or black cutworm.
If there isn't enough time for the cover crop to die before the cash crop is planted, pests can move from the cover crop into the cash crop. Be sure to scout fields so that timely insecticide applications can be made if pest populations warrant application.
Also, various Bt hybrids are marketed for control of pests like common stalk borer, true armyworm, and black cutworm, so keep this in mind when selecting hybrids for fields where corn will follow a cover crop.
Cover crop termination delays could also lead to reduced yield potential of the cash crop, if nutrients become limiting during early growth and development of the cash crop. Using a starter fertilizer in corn, for example, could help reduce potential issues. When conditions are dry, competition for water may also be a concern with late termination of the cover crop.
If you want to plant the cash crop into a standing cover crop - often called “planting green” - terminating the cover crop in a timely manner is critical. The cover crop should be terminated before it starts competing with the cash crop for light, nutrients, and/or water, which could reduce yield potential of the cash crop. “Planting green” into a cover crop can also increase the potential for insect pests in the cash crop (see above) or create a “green bridge” for pathogens to the cash crop.
The USDA Risk Management Agency website has additional information about cover crops and crop insurance.
One of the best sources of cover crop information is experience. Contact any neighbors, crop consultants, agency personnel or Extension educators with experience in managing cover crops. Most people with cover crop experience are more than willing to share what they have learned.
Guidance from other Extensions
Terminating cover crops - Iowa State University Extension and Outreach
Terminating cover crops: What's your plan? - Iowa State University Extension and Outreach: Termination planning
Cover crop termination - University of Illinois
Successful cover crop termination with herbicides- Purdue University Extension
Terminating cover crops - University of Wisconsin Extension
Reviewed in 2018